Setup NtopNG on PfSense the Correct Way
The official ntopng package for pfsense is full of bugs, but there is an alternative way to have a fully operational ntopng integration with pfsense.


Background
Ntopng is a great tool for diagnosing and monitoring your network. It is available on pfsense firewall through the builtin package manager. Unfortunately, the pfsense port of ntopng package which is installed through the gui package manger has been broken for a long time . In the latest pfsense 2.5 release, they updated ntopng to 4.2 which is great, but it contains a lot of bugs, sometimes ntopng keeps restarting on itself, other times it seems very slow, and I personally faced an issue that whenever an ntopng service restart occurs, all the package's config gets wiped out, so any modifications you make, like interface rename or adding alerts endpoints and recipients gets lost on next service restart. Also in the previous version of pfsense, which had ntopng 3.8, geolocation data was not being reported correctly. This all makes it useless to put in production environments.
Maybe the most optimal way to setup ntopng is to separate it from the firewall and use a dedicated box to record and analyze network traffic by using a port mirror. However, sometimes you are in a circumstance where it is not feasible to have a separate machine, or maybe the firewall box that you are using is powerful enough to add an active network monitoring function to it.
Tested On:
pfSense 2.5, ntopng 4.2
TL;DR
The better way to integrate ntopng with pfsense is by installing the ntopng package directly from the command line. These are the needed steps in short:
1- On pfsense 2.5, install ntopng and redis database using the shell
pkg install ntopng redis
2- Enable ntopng and redis services
sysrc redis_enable="YES"
sysrc ntopng_enable="YES"
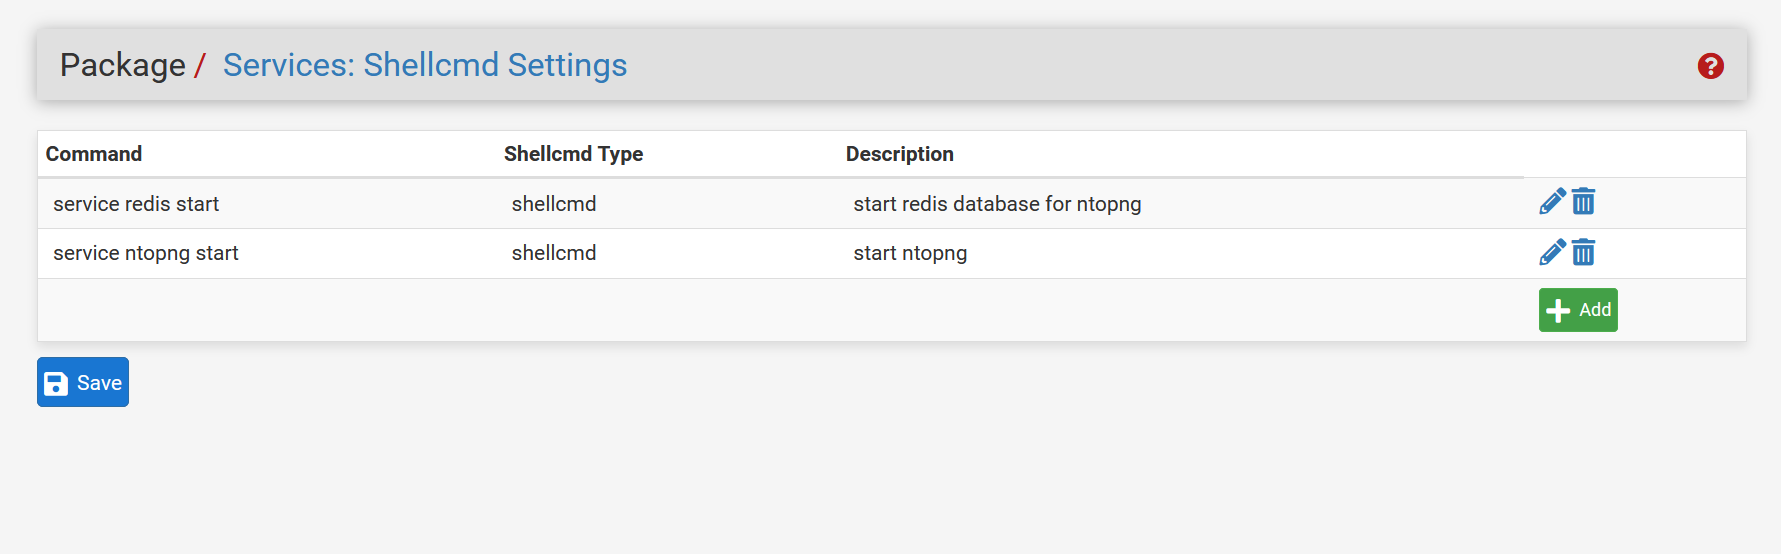
3- Install Shellcmd package from pfsense gui package manager
4- Add the below entries to Shellcmd settings and save
service redis start
service ntopng start
5- Configure ntopng geolocation by downloading the relevant .mmdb files from MaxMind and place them in the folder "/usr/local/share/ntopng/httpdocs/geoip"
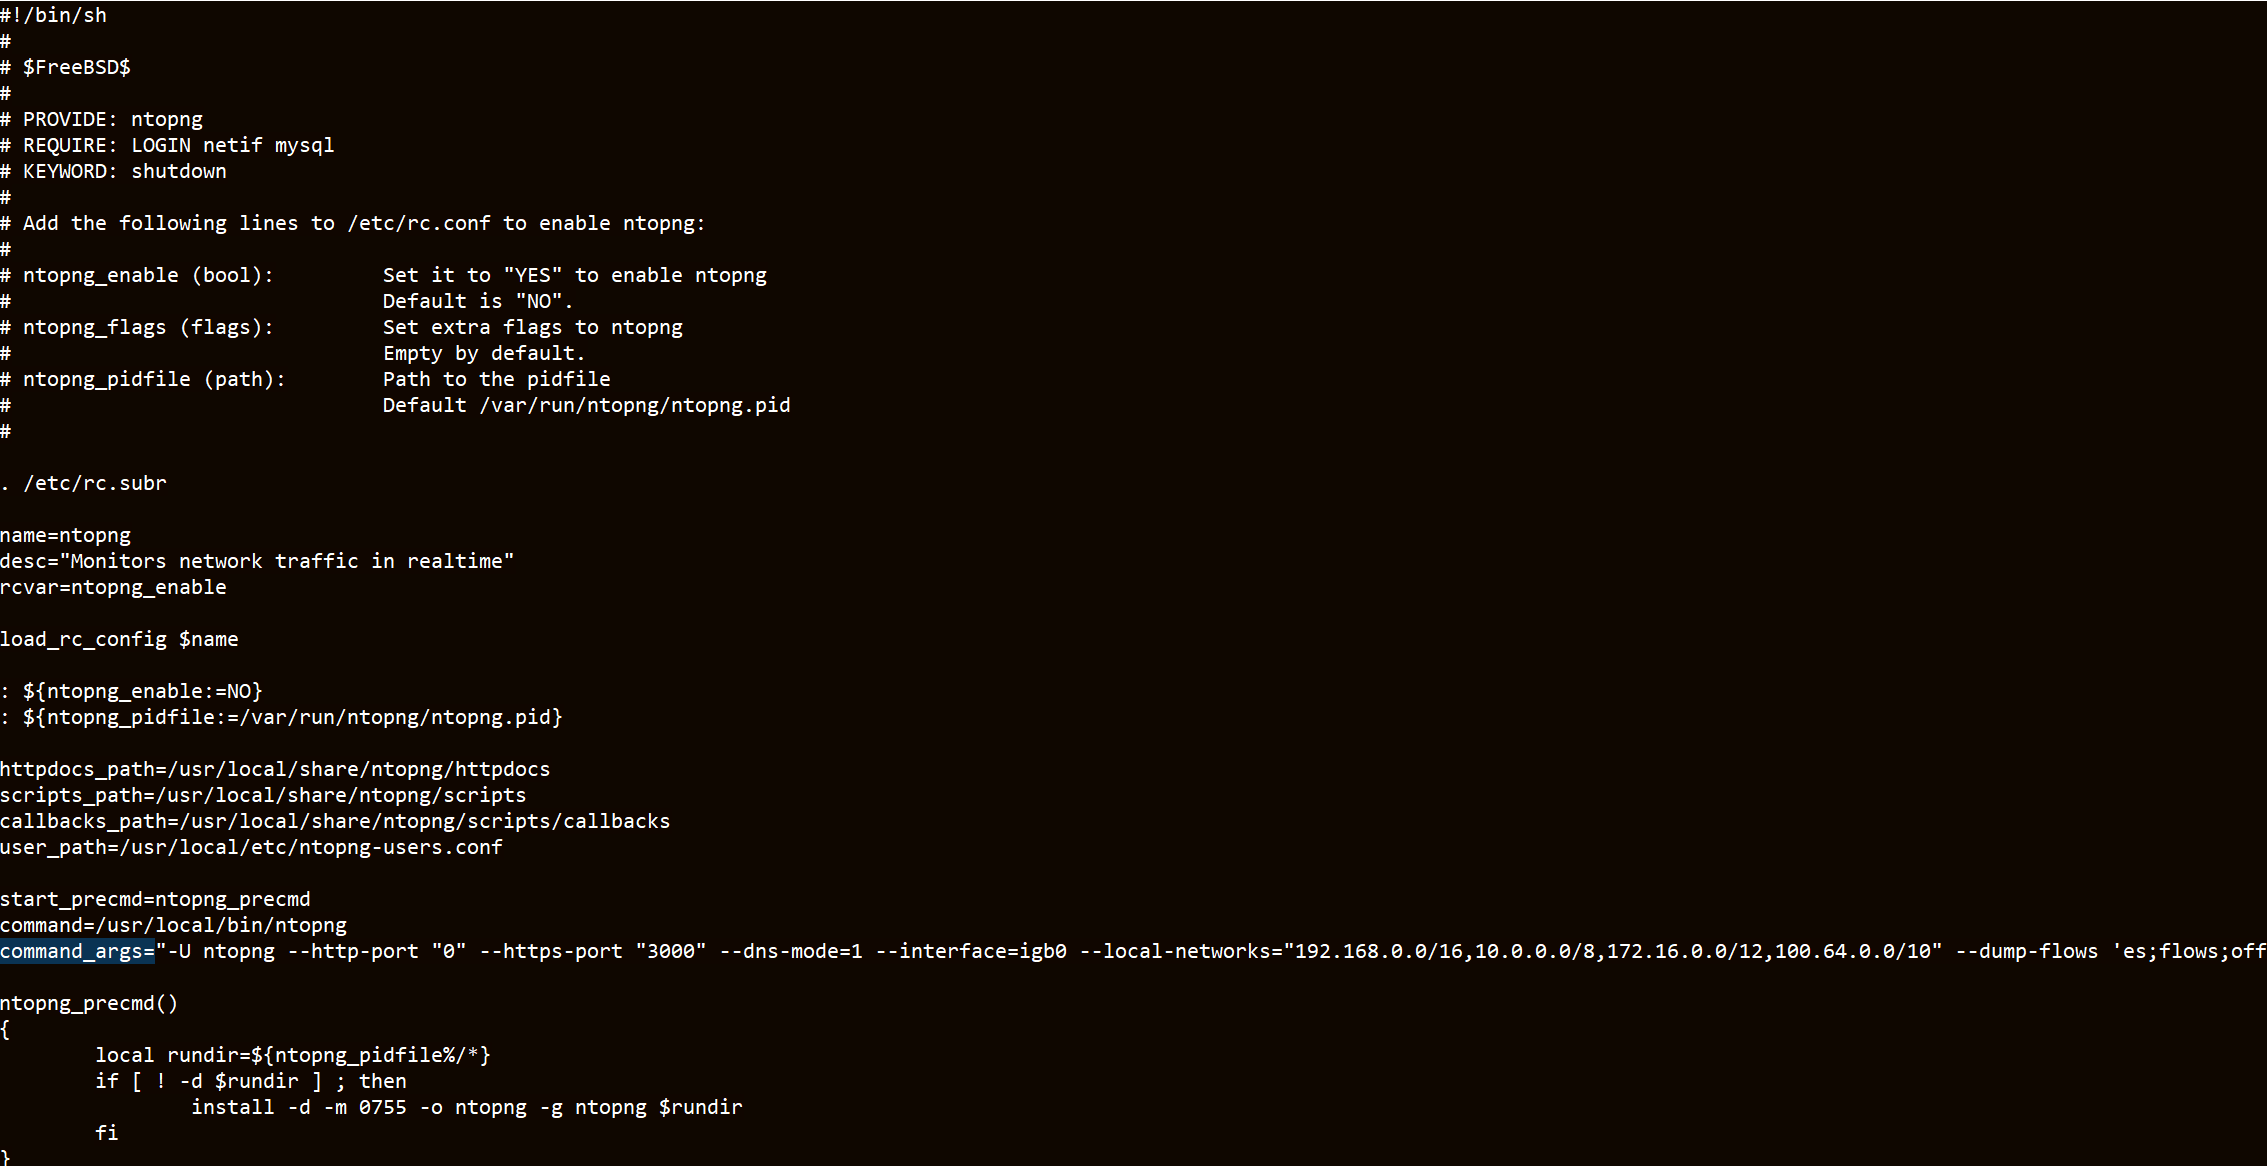
6- Edit the startup script of ntopng to add your custom command arguments located in "/usr/local/etc/rc.d/ntopng"
7- Start redis and ntopng services, or simply reboot pfsense
service start redis
service start ntopng
Details
First of all, you need to decide whether you are comfortable using the official but unstable ntopng development build from the original author's package repository (packages.ntop.org), or otherwise the official stable FreeBSD port maintained by the FreeBSD developer madpilot (pkg.freebsd.org), however, the one in FreeBSD repo sometimes gets too behind in development. Unfortunately the ntop.org does not provide a stable build, only a development snapshot (as the time of this writing).
If you decide to choose the stable build from (pkg.freebsd.org), then by default, pfsense uses (pkg.freebsd.org) so you do not need to add any additional sources. All you need to do is install ntopng and redis. To do that, connect to your pfsense using ssh or use the console and open the shell prompt.

pkg install ntopng redisIf you decide to install the latest but unstable build, then follow the instructions at (packages.ntop.org/FreeBSD), but use FreeBSD 12 if you are on pfsense 2.5 or later.
After installing ntopng and redis, you need to make them run automatically on boot. The way we do this by using a package called Shellcmd. It is available on pfsense package manager. Simply head over to system menu, then package manager and install Shellcmd. Once installed, go to services menu, then Shellcmd and add entries to start ntopng and redis on system boot.
Geolocation
Next, you need to setup geolocation databases if you want ntopng to report geolocation data. Refer to this Github Readme on how and why you need to do this. (https://github.com/ntop/ntopng/blob/dev/doc/README.geolocation.md).
Unfortunately, there is no pre-built geoipupdate package for FreeBSD, so you will have to download and update the databases manually, or you could lookup some scripts online that automate the process of downloading the databases from MaxMind for you. "/usr/local/share/ntopng/httpdocs/geoip" is where to put the downloaded database files.
Startup-Command Options
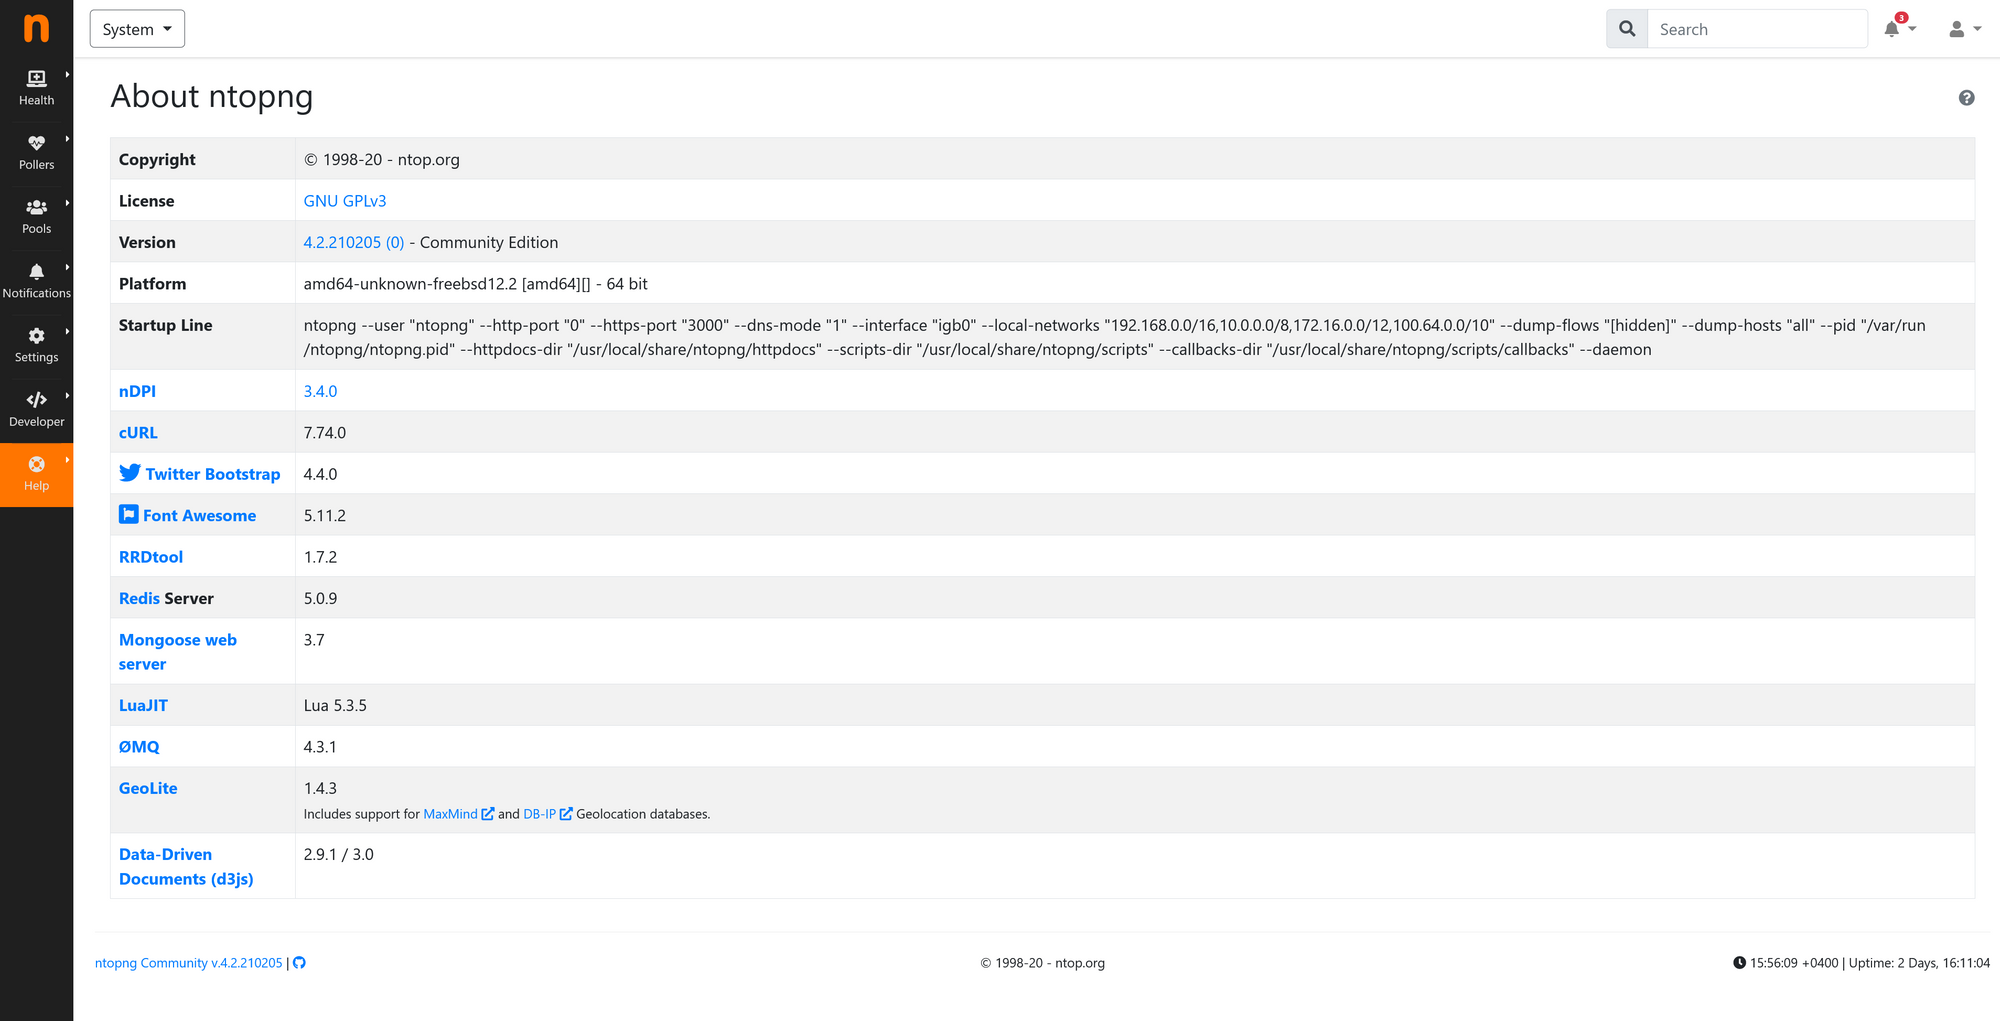
Now comes the part where you modify the startup script for ntopng to put whatever argument option you need. Edit the file located on "/usr/local/etc/rc.d/ntopng" using any text editor and go to the line that starts with "command_args=" and add the arguments that you need. You can refer to the official ntop docs here: (https://www.ntop.org/guides/ntopng/cli_options.html).
Ntopng is not designed to be used as an aggregator for network traffic data over long periods of time, instead, it is best used for live traffic monitoring. That is why if you want to keep network traffic for data retention, it is best to send flows to other databases that are more efficient for storing over longer periods.
For example, you could instruct ntopng to dump flows to an elasticsearch database using the argument:
--dump-flows 'es;flows;index_name%Y.%m.%d;http://ip_of_es:9200/_bulk;'
Another thing to note is, if you want to enable https for the ntopng access portal, after adding the command option --https-port "[port_number]", ntopng tries to find an ssl certificate but it doesn't find any. The easiest way correct this is to find and rename the provided dummy certificate to .pem file format. The dummy cert is located on "/usr/local/share/ntopng/httpdocs/ssl/ntopng-cert.pem.dummy".
Finally, once everything is setup correctly, you can start ntopng with
service redis start
service ntopng start
or simply rebooting pfsense should bring those services up.
Now you can head over to http(s)//:ip-of-pfsense:3000 or whatever port you defined in the startup options.