Setup Remote SPAN without Specialized Hardware using OpenVPN TAP Interfaces
Want to setup a Remote SPAN port but you don't have specialized hardware to do so? This article will walk you through how to do exactly that.

Want to setup a Remote SPAN port but you don't have specialized hardware to do so? This article will walk you through how to do exactly that using pfSense and Security Onion 2.4 to analyze the network for intrusion detection and security monitoring.
Today we will continue our experiments with pfSense and SPAN options just like in the last blog (SPAN and Management on a Single Physical Port), but this time using OpenVPN and bridge interfaces to achieve real remote cross-network traffic mirroring. The motive for this experiment stemmed from a situation I came across in an environment where the underlying network infrastructure does not allow sending or receiving network data frames with manipulated source and/or destination addresses (Virtual VMware environment where Promiscuous mode and MAC changes are restricted). So I figured why not tunnel that traffic through a P2P layer 2 tunneling solution? GRE, L2TP, and OpenVPN were considered. Settled on OpenVPN tap mode as a final solution.
Components Used:
Virtualized pfSense firewall.
Virualized Securtiy Onion 2.4.
Objective:
- Achieve (E)RSPAN-like feature without any dedicated hardware.
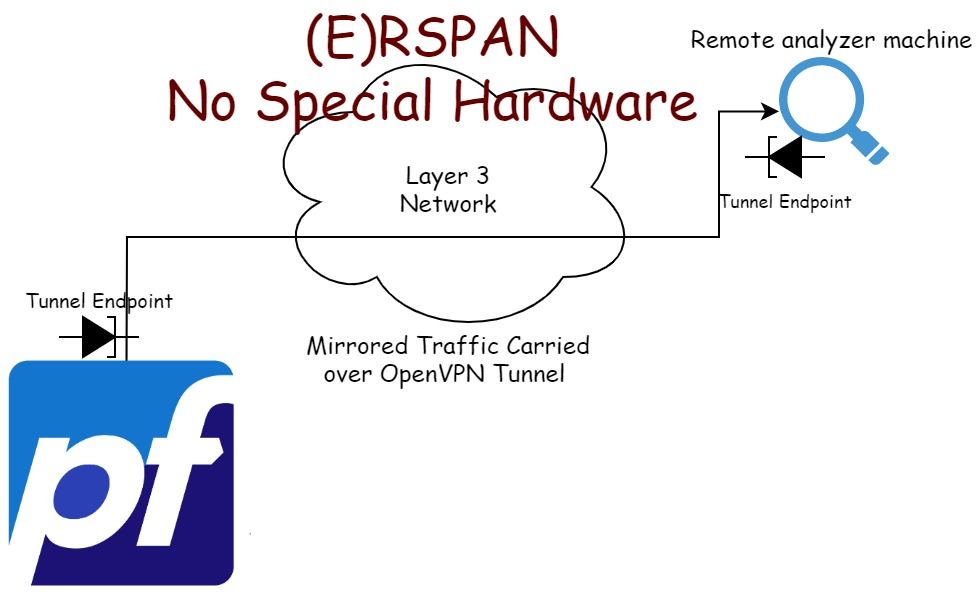
Let's first take an overview at our setup:
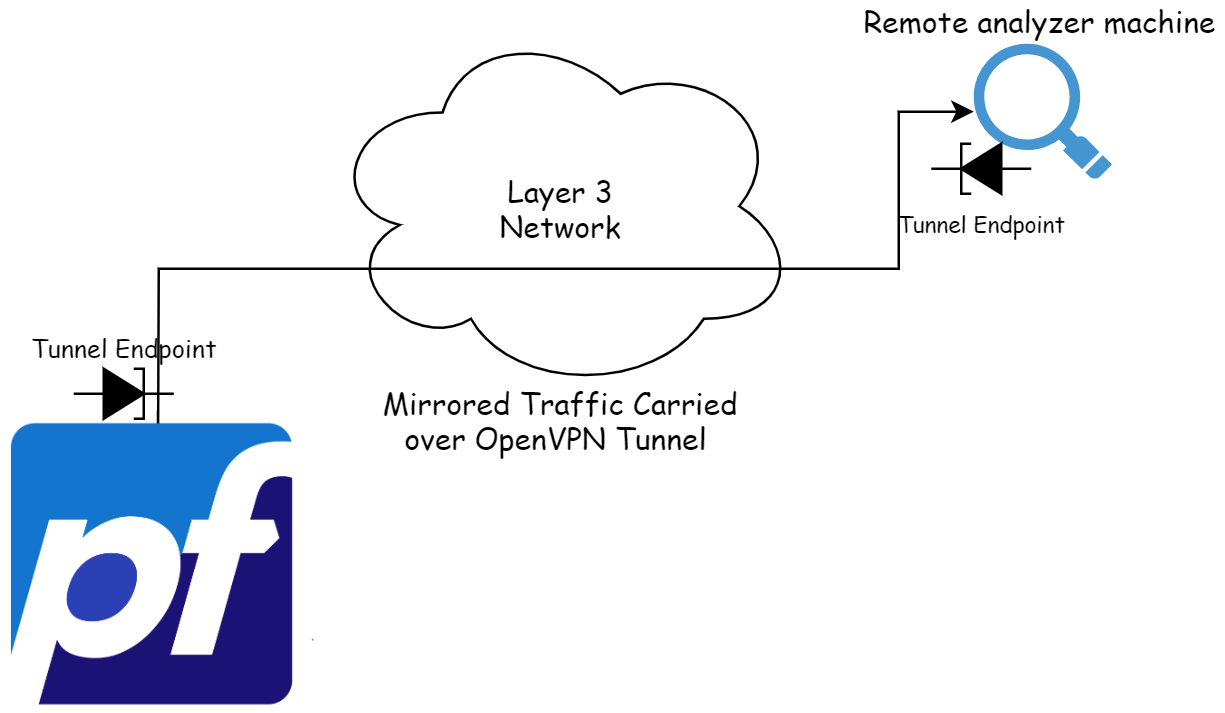
We can achieve this setup using a tunneling solution that supports carrying Ethernet over TCP/UDP (OpenVPN in tap mode in our case), together with software SPAN on pfSense which is handled by ifconfig utility in the backend. We can do traffic mirroring and specify the tunnel interface as the destination. The other end of the tunnel will receive the mirrored traffic as if it is connected directly to a SPAN.
Let's take a look on the network diagram to understand the network flow;
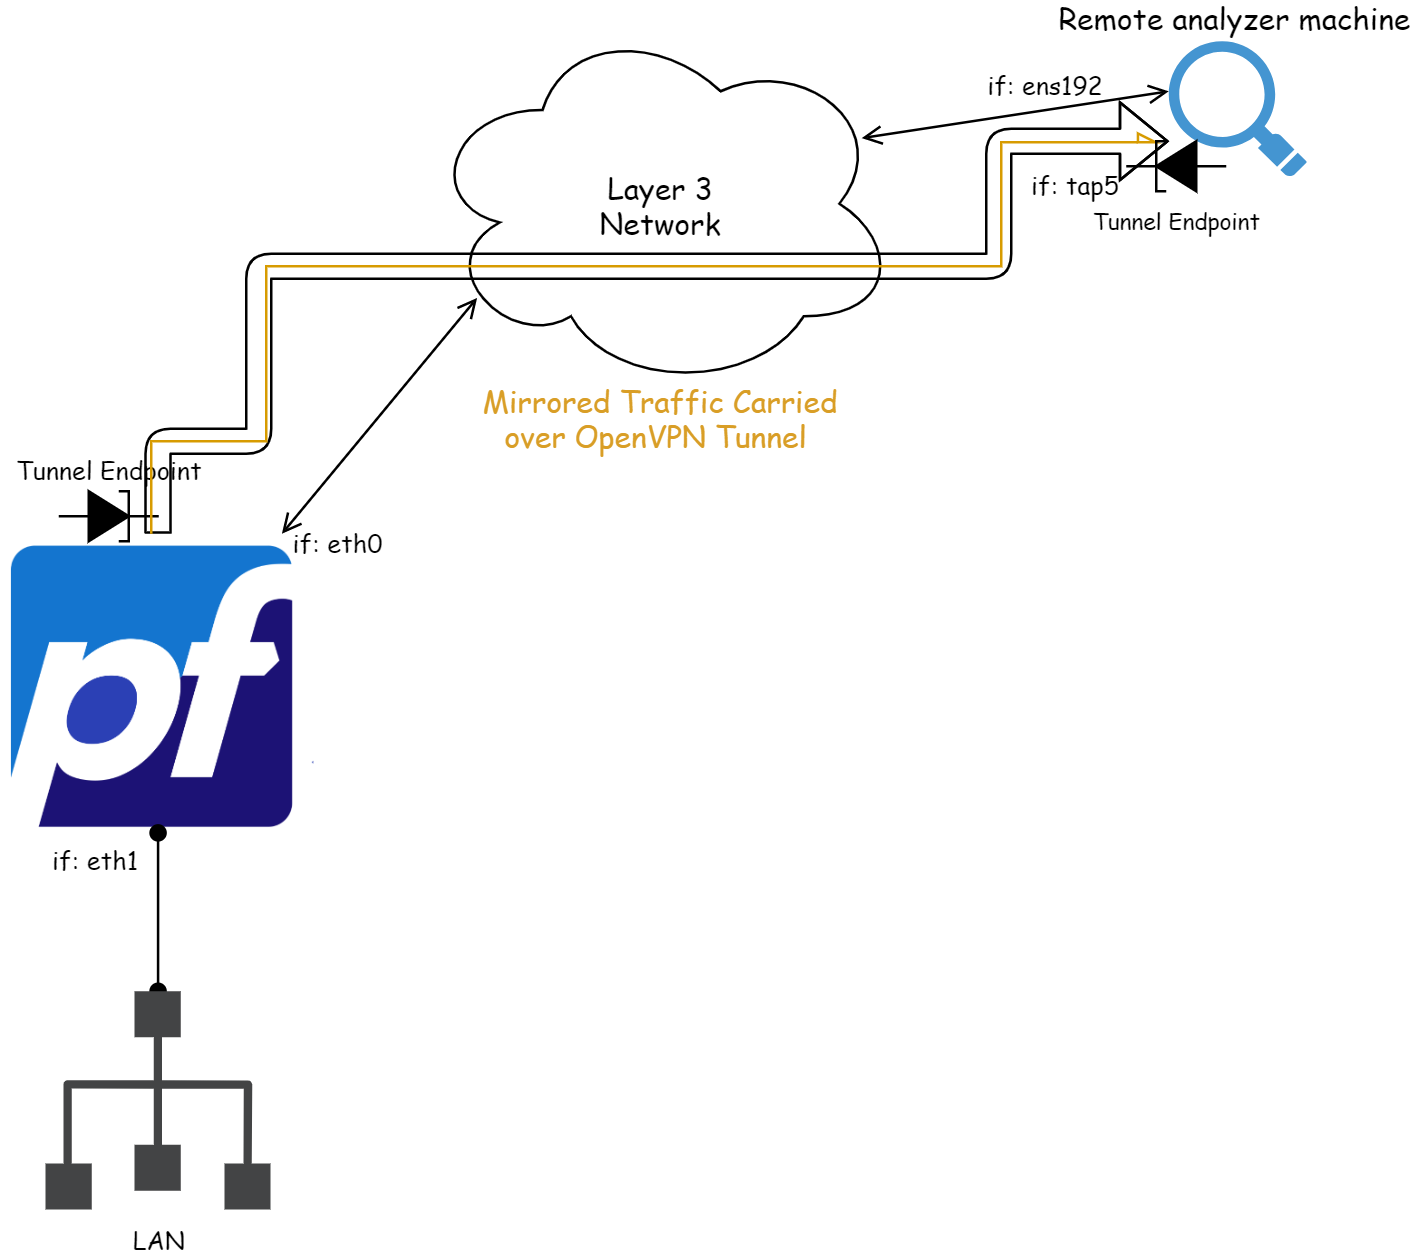
All traffic hitting pfSense on the eth1 interface will be mirrored to the OpenVPN tunnel interface, and because we are using tap mode, the other end of the tunnel (at tap5) will be able to see any (RAW) traffic crossing eth1 on pfSense.
Now let's get into the details on how to do it step by step. The first thing would be to setup the tunnel and make sure that it is operable.
Let's follow the following steps on pfSense.
- Create a new OpenVPN server with the following configurations;
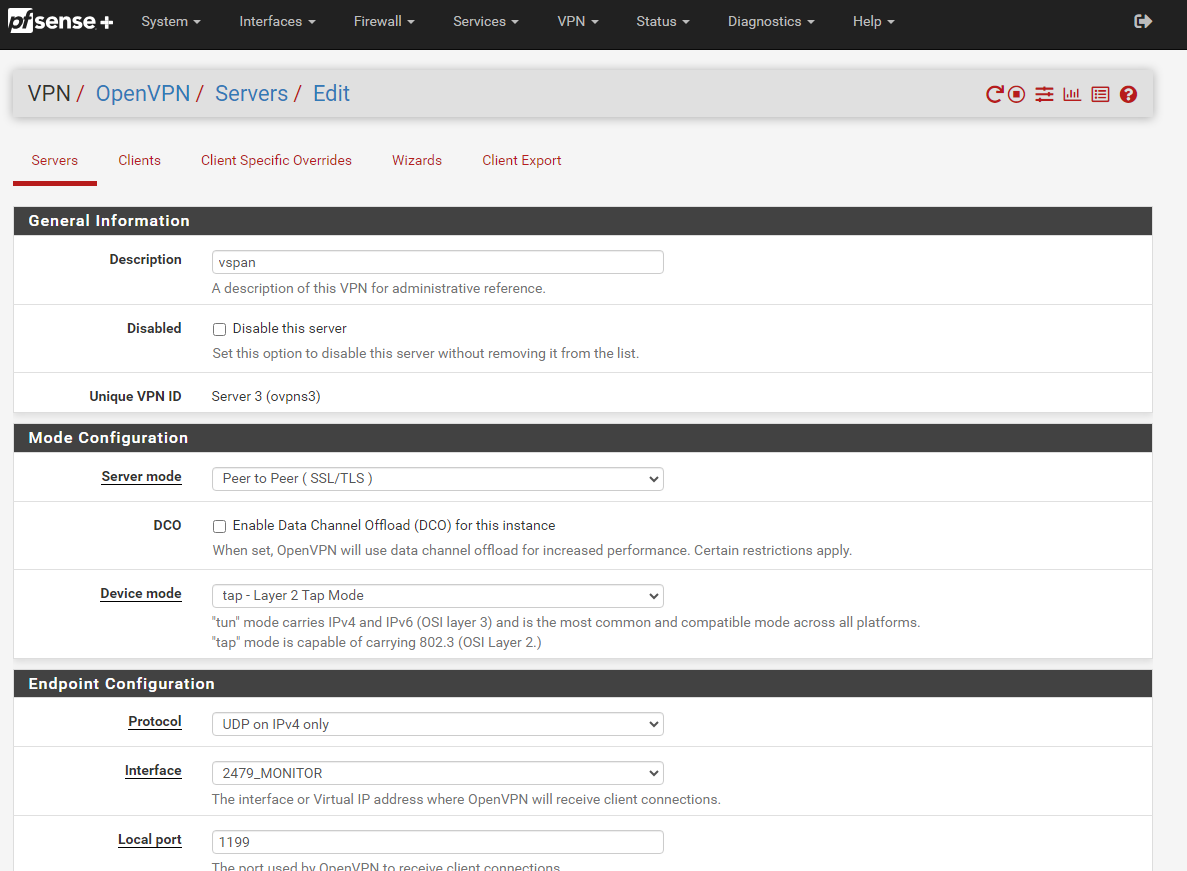
Server mode: Peer to Peer (SSL/TLS)
Device mode: tap - Layer 2 Tap Mode
IPv4 Tunnel Network: a single /32 address (e.g 192.168.224.31/32)
Custom options:
tun-mtu 1560;
mssfix 0;
reneg-sec 0;
Make sure to alter the tun-mtu value based on the parent interface max value minus the tunnel overhead.
These are the important settings to note. Complete the other settings as usually done when creating a server endpoint. You might also like to completely disable the tunnel's data channel encryption to reduce the unnecessary computation.
Now let's set up the client endpoint.
Obviously the first thing is to install OpenVPN package if it is not installed;
yum install openvpn
# apt install openvpn
# dnf install openvpn
Then create a client openvpn config file, below is a sample config for our scenario;
dev tap4
client
remote REMOTE_ADDRESS PORT
proto udp
tls-client
nobind
cipher none
tun-mtu 1560
auth none
auth-retry nointeract
persist-key
reneg-sec 0
persist-tun
script-security 2

# Script to run after the tunnel is up
up "/usr/share/scripts/ifenslave.sh"
ifconfig 192.168.224.32 255.255.255.255
route-nopull
fragment 0
mssfix 0

<ca>
-----BEGIN CERTIFICATE-----

-----END CERTIFICATE-----
</ca>
<cert>
-----BEGIN CERTIFICATE-----

-----END CERTIFICATE-----
</cert>
<key>
-----BEGIN PRIVATE KEY-----

-----END PRIVATE KEY-----
</key>
key-direction 1
In my use case, I am using Security Onion 2.4 as the client endpoint, and in order to tell the system that the monitor interface will be the tap4 interface, we use the command:
/sbin/ifenslave bond0 tap4And to do that automatically whenever the openvpn tunnel is started, we specify the 'up' option in the openvpn config file and point to the script that will run the command;
> cat /usr/share/scripts/ifenslave.sh
#!/bin/bash

/sbin/ifenslave bond0 tap4
Once the tunnel is up and we verified that it is functioning correctly, we can then proceed and start mirroring packets to the tunnel interface using pfSense bridge interface (ifconfig), but first we need to define the tunnel interface on pfSense;
Interfaces > Assignment > Interface Assignments
And add the the OpenVPN server instance as an interface, enable and save.
Then we add a new bridge interface in order to create a virtual SPAN port;
Interfaces > Assignment > Bridges > Add
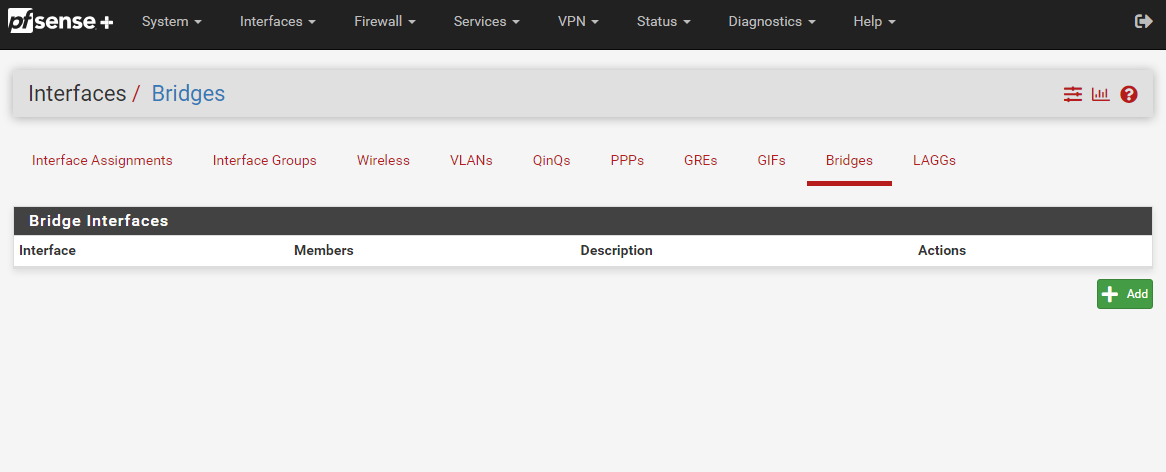
We specify only one interface on the member list (the interface to be mirrored), and specify the tunnel interface as the SPAN port.
After all is done; we should start receiving mirrored traffic on the other end of the tunnel and start analyzing packets.
> tcpdump -i tap4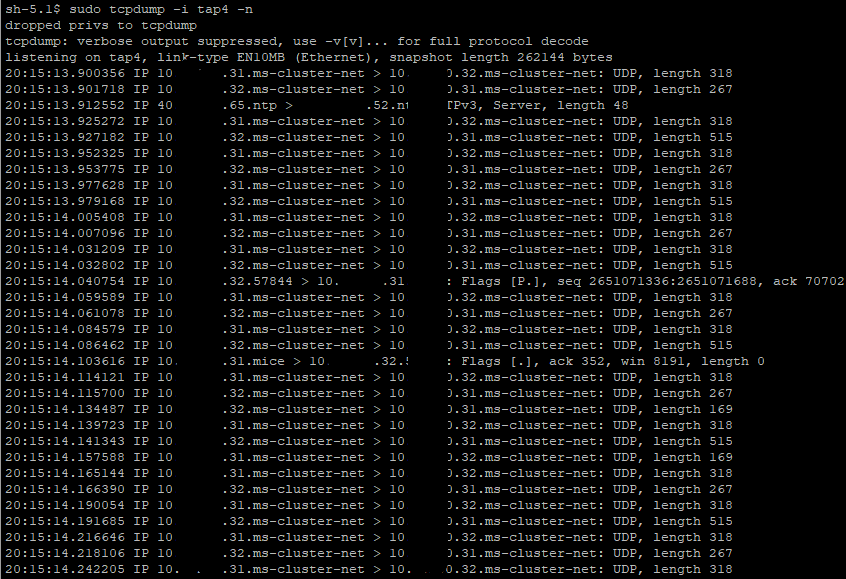
Recap
We were able to achieve (E)RSPAN-like feature with only virtualized systems without any need for dedicated hardware.